For all of you, whether you are trying heirloom sewing for the first time or have done this before, this may be the most important lesson of the entire class.
Print out this lesson and start a notebook or file.
You will be taping samples into the notebook and writing down your sewing machine settings for each exercise next to your sample.
The purpose of your samples is to test your materials and find the perfect settings for you and this project. The combination of your laces, fabrics, thread, and sewing machine are all different from what I or anyone else is using. I can't tell you what setting to use, you have to test and make your samples in order to decide which setting works best for your materials.
This 'sample' exercise is not something made up just for the novice 'heirloomer', it is something we all do every time we start a new heirloom project with different laces or fabrics than we have ever used before. You will find this to be a useful lesson to use for any sewing project whether it be heirloom sewing or not.
As you get each sample finished, tape a piece of it into your notebook by the instructions for making it. Take note of the stitch settings you used to create your sample and write them down next to the sample. When you get to that portion of the project where you need to use each method, you will have the information to set up your machine without having to go through a tedious trial and error period that can cause loss of interest in the project.
SAMPLE 1 |

|
"Finishing Fabric Edges" |
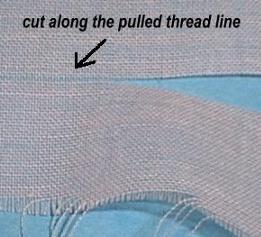
Cut a small piece of your voile since that is the fabric we will be working with first. A 4"x6" piece will work nicely. |

|

|
Spray starch your fabric. |
Sample 2 |

|
From the right side of the fabric you should only see the thread |
 |
|
Sample 3 Machine Zigzag (my preferred method) Spray starch the edge of the fabric and press 1/4" to the inside. |
 |
Finish the pressed edge with a narrow zigzag. |
 |
Trim the excess off the 1/4" raw edge. |
 |
Sample 4 |

|
Now that you have several finished edges on fabric, we can go back to practicing with sewing flat laces to these different fabric edges. Re-starch your fabric and lace each time. You may end up re-starching the same piece of fabric many times before you have finished your project because each time you handle it, it will soften up. This is normal.
Normally I would use a thread color to match the lace, but for these lessons I will use white or a contrast thread to make it easier to see in the photos.
 |
Sample 5 |
Sample 6 (optional) |

|
 |
This is how the above method looks when finished. It takes a bit of practice, but well worth the effort and uses much less of our expensive lace than gathering would use. |
or saved as complete webpages (including photo's).
Instructions For Making a Desktop Folder
and Saving Lesson Pages!
You are visitor number
| HOME | CLASSES | CLASS 39 INDEX | LESSON 1 |
| LESSON 2 | LESSON 3 | LESSON 4 | LESSON 5 |
| LESSON 6 | LESSON 7 | LESSON 8 | LESSON 9 |
| LESSON 10 | LESSON 11 | LESSON 12 | LESSON 13 |